
Most bad pour-over coffee comes down to five things: grind size, water temperature, coffee-to-water ratio, a rushed bloom, or sloppy pouring. If you fix only one thing today, adjust your grind. It’s the single biggest lever on extraction, and getting it wrong throws off everything downstream, from your bloom to your final drawdown time.
Before you troubleshoot anything else, run these checks:
- Weigh your coffee and water on a scale instead of eyeballing scoops. A ratio that’s off by even a few grams changes the whole cup.
- Check the roast date on the bag. Coffee more than a month past roasting brews flat no matter how well you dial in the rest.
- Rinse your paper filter with hot water before adding grounds. Skipping this leaves a papery taste that masks what your coffee actually tastes like.
Key Takeaways
Most pour-over failures trace back to grind size, ratio, water temperature, bloom timing, or pour technique, and fixing them one at a time is what actually works.
| Point | Details |
|---|---|
| Adjust grind first | Grind size has the biggest impact on extraction, so change it before touching temperature or ratio. |
| Diagnose by taste | Sour means under-extraction, bitter means over-extraction, and weak usually means a ratio that’s too light. |
| Watch for channeling | Sour and bitter together in the same cup usually points to uneven bed distribution, not grind. |
| Change one variable at a time | Log dose, grind setting, temperature, and brew time so you know which change actually worked. |
| Start with fresh, well-matched beans | Tri Crow Coffee’s small-batch medium roasts, like the Medium Roast Cold Brew Coffee, give you a stable baseline for dialing in technique. |
Table of Contents
- Common Pour Over Mistakes and How to Fix Them
- What Does Your Cup’s Taste Tell You About the Fix?
- What Equipment Actually Prevents These Mistakes?
- How Do You Dial In a Recipe in a Few Brews?
- What Do Tri Crow Coffee’s Small-Batch Standards Bring to Pour-Over?
- Why Precision Beats Perfectionism in Pour-Over
- Which Tri Crow Coffee Roasts Work Best for Dialing In Pour-Over?
- Sources
- FAQ
Common Pour Over Mistakes and How to Fix Them
Pour-over problems rarely have one cause. They usually stack, which is why a coffee that tastes sour AND weak needs a different fix than one that’s just sour. Work through these in order, and change one variable at a time so you actually know what fixed it.
1. Grinding too coarse. Water passes through oversized particles too fast, pulling out acids but never reaching the sugars and body that round out a cup. The result tastes sharp, thin, and sometimes salty. Grind one or two steps finer and re-brew before touching anything else.
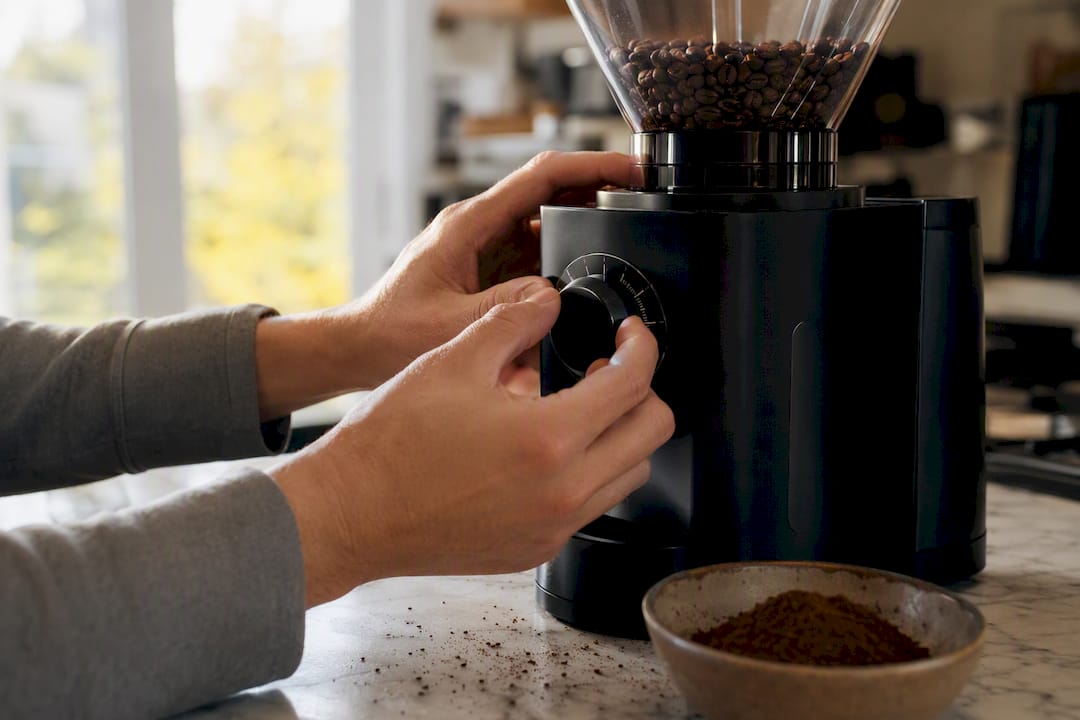
2. Grinding too fine. The opposite problem: water sits too long against tiny particles, over-extracting bitter compounds while the brew crawls to a stop. If your pour-over takes noticeably longer than it should and tastes harsh or drying, coarsen the grind by one or two steps. Grind size is the single biggest lever on extraction, and this is exactly why it’s worth ruling out before you blame your beans or your kettle.
3. Using the wrong ratio. A cup that tastes muted or watery is often just too diluted, no matter how good the grind is. Get a cheap kitchen scale and start at 1:15 to 1:16 (grams of water per gram of coffee), then adjust from there based on taste, not habit.
4. Water that’s too hot or too cold. Water below 195°F under-extracts and tastes flat and sour. Water above 205°F scalds the grounds and pulls out excess bitterness. If you don’t own a gooseneck kettle with a thermometer, boil your water and wait 30 to 45 seconds before pouring to land in a reasonable range.
5. Skipping or rushing the bloom. The first pour, roughly two to three times the coffee’s weight in water, should sit for 30 to 45 seconds before you continue. This lets trapped gas escape and saturates the grounds evenly. Some controlled testing has found that blooming’s effect on dissolved CO2 is smaller than people assume, but its real value shows up in bed saturation and distribution, not the gas itself. Skip it, and you’ll often see dry pockets in the grounds later. Our guide to coffee blooming covers the mechanics in more detail.
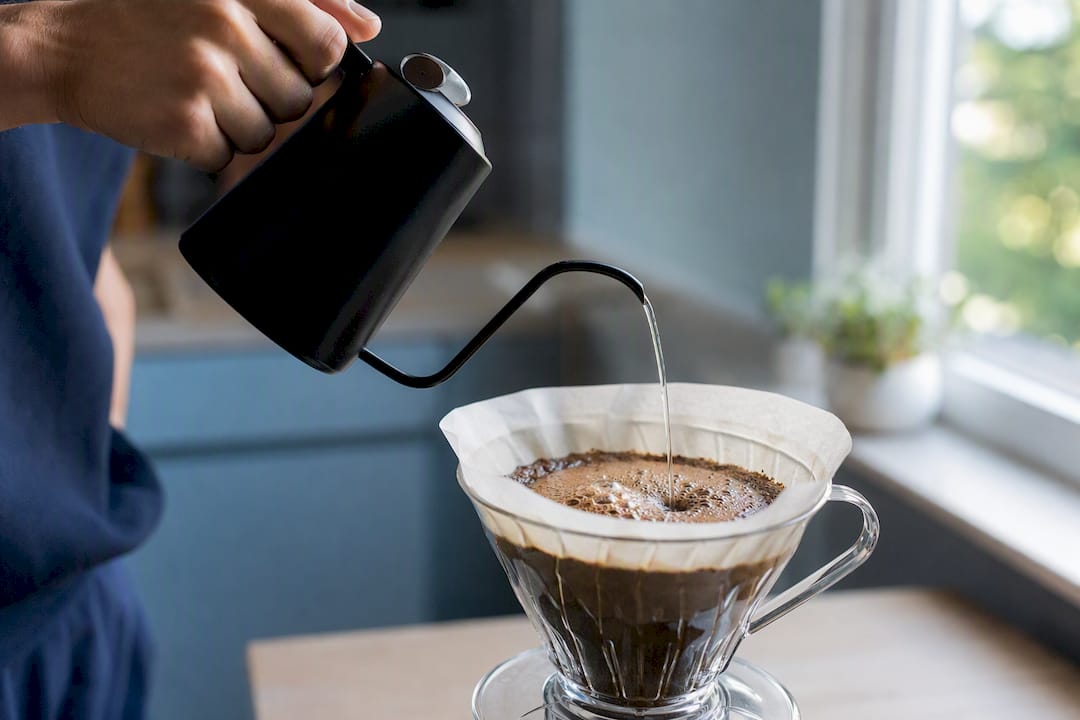
6. Pouring too fast, too high, or against the wall. A thin, controlled stream from two to three inches above the bed keeps extraction even. Dumping water in a heavy splash, or pouring right at the filter’s edge instead of the coffee bed, creates uneven saturation and channels where water finds the path of least resistance. Slow concentric circles, starting from the center and spiraling outward, solve most of this.
7. Ignoring filter prep and paper type. Thicker filters, like those used in a Chemex, hold onto more papery compounds and slow water flow more than thin V60-style filters. Rinse thoroughly regardless of type, and match your grind expectations to the filter you’re using.
8. Brewing with stale or pre-ground coffee. Ground coffee loses aroma and flavor within days, not weeks. Whole beans stored in an airtight, opaque container hold their character far longer, so grind right before you brew and buy in quantities you’ll actually use within a month of the roast date.
9. Uneven bed distribution, also known as channeling. If your grounds settle unevenly after the bloom, water finds gaps and rushes through them while the rest of the bed barely gets touched. This is sneaky because it can produce a cup that’s sour AND bitter at once, since parts of the bed under-extract while others over-extract. A gentle swirl after blooming and slow, low-agitation pours largely prevent it.
Pro Tip: Keep a small notebook or notes app entry with your grind setting, dose, water temperature, and brew time for every cup. Patterns you can’t see in the moment, like “every batch after day 10 tastes flat,” jump out once you have three or four data points side by side.
Extraction itself follows a rough order: acids dissolve first, sugars next, bitter compounds last. Most flavor problems are really a timing problem, stopping the brew too early or too late relative to that sequence, rather than a defect in the beans themselves. Our breakdown of coffee extraction walks through why that staircase matters for every decision above.
What Does Your Cup’s Taste Tell You About the Fix?
Your tongue is a better diagnostic tool than any gadget you own. A straightforward taste-based framework maps sourness to under-extraction and bitterness to over-extraction, and pairing that with your drawdown time narrows the cause fast.
| Symptom | Likely cause | First fix |
|---|---|---|
| Sour, sharp, acidic | Under-extraction | Grind finer, raise water temperature slightly, extend contact time |
| Bitter, harsh, drying | Over-extraction | Grind coarser, lower water temperature, shorten brew time |
| Weak, watery, muted | Ratio too light | Tighten the ratio (add coffee or remove water) before touching grind |
| Slow drawdown, brew stalls | Fines or a compacted bed | Coarsen the grind, check your grinder for consistency, avoid pouring a deep crater |
| Sour and bitter together | Channeling | Level the bed, do a full bloom, pour gentle concentric circles |
A few things worth remembering as you read that table:
- Grind is almost always the first thing to touch. It’s the variable most likely to explain sour or bitter cups on its own.
- Weakness is a ratio problem far more often than a grind problem. Adding coffee usually fixes it faster than grinding finer.
- If your brew time keeps creeping up brew after brew, suspect your grinder’s consistency before blaming technique. Worn or cheap burrs drift over time.
- Sour-and-bitter together is the one combination that isn’t about grind size at all. It’s a distribution problem, and no amount of grind adjustment fixes uneven water contact.
What Equipment Actually Prevents These Mistakes?
You don’t need expensive gear to brew well, but a few pieces matter more than people expect.
- Grinder: blade grinders chop coffee into wildly inconsistent particle sizes, producing a mix of dust and boulders in the same batch, which makes balanced extraction nearly impossible. Even a modest burr grinder narrows that range enough to fix most of the symptoms above.
- Kettle: a gooseneck kettle gives you control over pour speed and placement that a standard kettle can’t match. No thermometer? Boil, then let it sit for 30 to 45 seconds before pouring, per the SCA’s practical range.
- Scale and timer: weighing beats scooping every time, since coffee density varies by roast and grind. A $15 kitchen scale with a built-in timer removes half your variables in one purchase.
- Dripper geometry: a V60’s conical shape and large exit hole want a slightly coarser grind and faster flow than a flat-bottomed Kalita, while a Chemex’s thick filter demands a coarser grind still to avoid a stalled brew.
- Storage: an airtight, opaque container at room temperature, never the refrigerator, and beans used within a few weeks of the roast date.
If your machine or grinder itself seems to be misbehaving rather than your technique, a practical troubleshooting guide for coffee equipment is worth a look before you assume it’s you.
How Do You Dial In a Recipe in a Few Brews?
Start with a baseline: 20 grams of coffee to 320 grams of water, medium fine grind, three to four minute total brew time. Then follow this sequence.
- Brew the baseline and taste it honestly. Note whether it leans sour, bitter, or weak using the table above.
- Change grind first, nothing else. If sour, go finer by one setting. If bitter, go coarser. Re-brew with everything else identical.
- Adjust temperature next, once grind feels close. Small moves, five degrees at a time, matter more than people expect.
- Tighten the ratio if the cup still tastes weak after grind and temperature are dialed in.
- Test pour technique last. Level the bed, bloom fully at two to three times the coffee weight for 30 to 45 seconds, then pour gentle concentric circles and compare against your previous cup.
Log each attempt: dose, grind setting or click number, rough water temperature, total brew time, and a one-line tasting note. A stepwise, one-variable-at-a-time approach keeps beginners from overcorrecting several things at once, which is the single most common reason people stay stuck for weeks. Our pour-over workflow guide has a printable version of this sequence if you want something to keep by the kettle.
Pro Tip: Run your channeling test separately from your grind test. Level the bed after your bloom, look for dry patches on the surface, and pour in slow spirals. If that alone fixes a rough cup, you were never dealing with a grind problem in the first place.
What Do Tri Crow Coffee’s Small-Batch Standards Bring to Pour-Over?
I’m David, and I write about brewing for Tri Crow Coffee’s blog. Small-batch roasting means tighter control over roast date and consistency, two things that quietly undo a lot of pour-over technique when they’re off.
A few rules I keep coming back to:
- Change one variable per brew. It’s slower, but it’s the only way to actually learn your setup.
- Keep a simple log. You don’t need an app, just dose, grind, and a tasting note.
- Grind fresh, every time, right before you pour water.
- For pour-over, filter-friendly medium roasts give you the most room to adjust grind and temperature without falling into harsh bitterness.
- Lighter roasts reward precision. If you’re still dialing in your technique, a medium roast forgives small mistakes better while you learn.
For deeper reading, our posts on coffee blooming and coffee extraction go further into the mechanics behind these rules.
Why Precision Beats Perfectionism in Pour-Over
Here’s what most pour-over advice gets backward: it treats bad coffee as a knowledge problem, when it’s almost always a process problem. You can read every extraction chart in existence and still brew a bad cup if you change your grind, your ratio, and your pour technique all in the same session and have no idea which one moved the needle.
The conventional wisdom obsesses over exotic variables, water mineral content, specific pour patterns, brewer geometry debates, while skipping the boring stuff that actually causes most bad cups: an unrinsed filter, a grinder that hasn’t been recalibrated in months, coffee that’s been sitting ground in a bag for two weeks. Academic reviews of the extraction process back this up, noting that extraction depends on many interdependent variables, which is exactly why changing five things at once tells you nothing.
If I had to pick one habit for a home brewer to adopt this month, it wouldn’t be a new dripper or a fancier kettle. It would be the discipline to change one thing, taste it, write it down, and repeat. That’s slower than chasing the latest brewing trend, but it’s the only method that actually teaches you your own setup.
Which Tri Crow Coffee Roasts Work Best for Dialing In Pour-Over?
If your technique is solid but your beans are working against you, the fix might be simpler than another round of grind adjustments. Tri Crow Coffee roasts in small batches specifically to keep freshness and consistency tight, which matters more for pour-over than almost any other brew method, since pour-over exposes every flaw a stale or inconsistent roast tries to hide.
Our Medium Roast Cold Brew Coffee brings chocolate and floral notes that hold up well through the grind adjustments you’ll make while dialing in a new recipe. If you want a bolder, higher-caffeine option once your technique is settled, the Max Caf Blend built on Tanzania and India Robusta gives you more intensity to work with. Prefer something you can dial in without wasting a full bag on a bad brew? Consider grabbing a smaller quantity so you can run through several test brews while the beans are still within their freshness window, rather than committing to a large bag before you know your ideal grind setting. Browse the full Tri Crow Coffee shop to find a roast that matches how you actually brew, then start your next dial-in session with beans built for the process, not against it.
Sources
- Pour-Over Troubleshooting: Fix Sourness, Bitterness, and Slow Drawdown
- How to Make Pour Over Coffee: The Complete Guide (2026)
- Why coffee tastes bitter, sour or weak
- National Coffee Association — How to store coffee
FAQ
What is the secret to good pour-over coffee?
There isn’t one secret. It’s consistency: the same grind, the same ratio, and the same pour technique every time, so you can actually tell what a change did to the cup.
What is the 15-15-15 rule for coffee?
There’s no single agreed-upon “15-15-15 rule” in pour-over brewing; definitions vary across brewing communities. A more reliable starting point is a 1:15 to 1:16 coffee-to-water ratio with a three to four minute total brew time.
Why does my pour-over take too long?
A slow drawdown almost always means your grind is too fine or your grinder is producing excess fines, which clog the filter bed. Coarsen the grind by one or two steps and check whether your grinder produces consistent particle sizes.
Why is my pour-over so weak?
Weak coffee is usually a ratio problem, not a grind problem. Tighten your ratio toward 1:15 by adding more coffee before you touch your grind setting.
How do I fix a pour-over that tastes both sour and bitter?
That combination usually points to channeling, where water finds gaps in the coffee bed instead of passing through evenly. Level the bed after blooming and pour in slow, gentle concentric circles.